• Overview
    • Introduction
    • User Interface Description
    • Installing Umajin
    • Shortcuts
    • Asset Management
    • Responsive Content
    • Project Icon
    • Text Styles
    • Guidewires
    • Presets
    • Glossary
    • Multi-user
    • Project Events
  • Components
    • Intro
    • Page
    • Basic
      • Arrow
      • Button
      • Circle
      • HTML Article
      • Image
      • Image Zoomer
      • Nine Slice
      • Rectangle
      • Text
      • Tiler
      • Toggle Button
      • Web View
    • Navigation
      • Carousel
      • Dropdown Menu
      • Glass Shelf
      • Hamburger Menu
      • Tool Bar
    • Data Driven
      • Animated Feed
      • Dynamic Article
      • Feed Item View
      • Feed List
    • Forms
      • Form
      • Text Entry
    • Layout
      • Gallery
      • Group
      • Layout Group
      • Scroll Panel
    • Media
      • 3D Model
      • Spine Animation
      • Lottie Animation
      • Avatar
      • Canvas
      • Particle
      • Render Kit
      • Speech Player
      • Video
    • Maps
      • Google Maps
      • Offline Map
      • Offline Map Route Editor
      • Map creation guide
      • Beacon installation for indoor mapping
    • Internet of Things (IoT)
      • Bluetooth BLE
    • Masters
    • Custom Components
  • Actions
    • Add and Configure Actions
    • Basic Actions
    • Navigation Actions
    • Layout Actions
    • Appearance Actions
    • Animation Actions
    • Media Actions
    • Avatar Actions
    • Gallery Actions
    • Form Actions
    • Data Driven Actions
    • Maps Actions
    • IOT (Internet of Things) Actions
    • Advanced Actions
    • Custom Actions
  • Tutorials
  • Cloud Services
    • Overview of Cloud Services
    • Google Analytics
    • Umajin Analytics
  • Publishing
    • Introduction
    • Umajin Editor Lite
    • iOS – Apple App Store
    • Android – Google Play Store
    • Mac
    • Windows
Menu
  • Overview
    • Introduction
    • User Interface Description
    • Installing Umajin
    • Shortcuts
    • Asset Management
    • Responsive Content
    • Project Icon
    • Text Styles
    • Guidewires
    • Presets
    • Glossary
    • Multi-user
    • Project Events
  • Components
    • Intro
    • Page
    • Basic
      • Arrow
      • Button
      • Circle
      • HTML Article
      • Image
      • Image Zoomer
      • Nine Slice
      • Rectangle
      • Text
      • Tiler
      • Toggle Button
      • Web View
    • Navigation
      • Carousel
      • Dropdown Menu
      • Glass Shelf
      • Hamburger Menu
      • Tool Bar
    • Data Driven
      • Animated Feed
      • Dynamic Article
      • Feed Item View
      • Feed List
    • Forms
      • Form
      • Text Entry
    • Layout
      • Gallery
      • Group
      • Layout Group
      • Scroll Panel
    • Media
      • 3D Model
      • Spine Animation
      • Lottie Animation
      • Avatar
      • Canvas
      • Particle
      • Render Kit
      • Speech Player
      • Video
    • Maps
      • Google Maps
      • Offline Map
      • Offline Map Route Editor
      • Map creation guide
      • Beacon installation for indoor mapping
    • Internet of Things (IoT)
      • Bluetooth BLE
    • Masters
    • Custom Components
  • Actions
    • Add and Configure Actions
    • Basic Actions
    • Navigation Actions
    • Layout Actions
    • Appearance Actions
    • Animation Actions
    • Media Actions
    • Avatar Actions
    • Gallery Actions
    • Form Actions
    • Data Driven Actions
    • Maps Actions
    • IOT (Internet of Things) Actions
    • Advanced Actions
    • Custom Actions
  • Tutorials
  • Cloud Services
    • Overview of Cloud Services
    • Google Analytics
    • Umajin Analytics
  • Publishing
    • Introduction
    • Umajin Editor Lite
    • iOS – Apple App Store
    • Android – Google Play Store
    • Mac
    • Windows
Components > Simple Feed
Simple Feed
Components,Beginner
  
December 22, 2020
  
Arjun Kumar

Overview

In this tutorial, we will look into adding a simple feed for your project via cloud services.

Prerequisites

Umajin Editor downloaded and installed.

Instructions

We will start by creating a simple feed component that will map through a title that we will have uploaded to the Umajin Cloud.

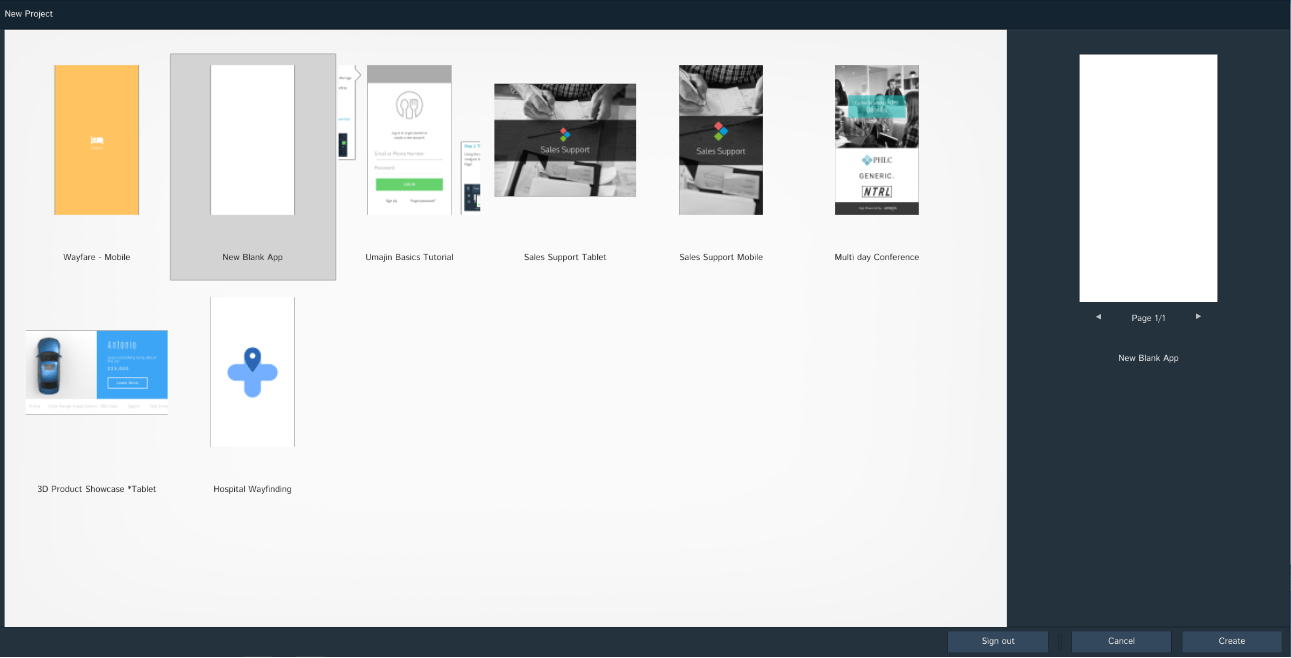
Step 1) Create a new blank project in the Umajin Editor to use as a testing platform for the simple feed.

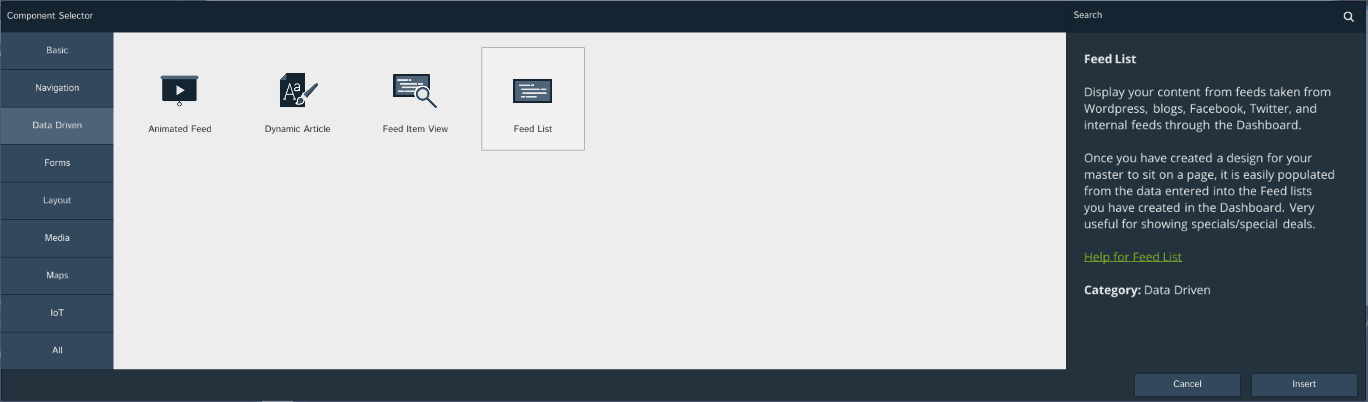
Step 2) Add a new Feed List Component from the Component Selector on the main page.

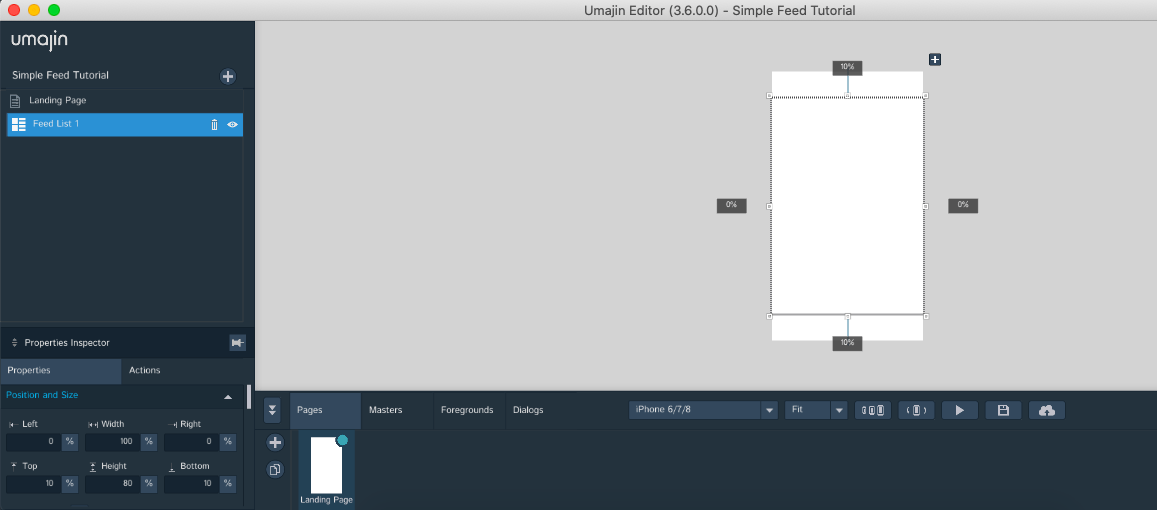
Once the feed component has been inserted into the page, it should look like this.

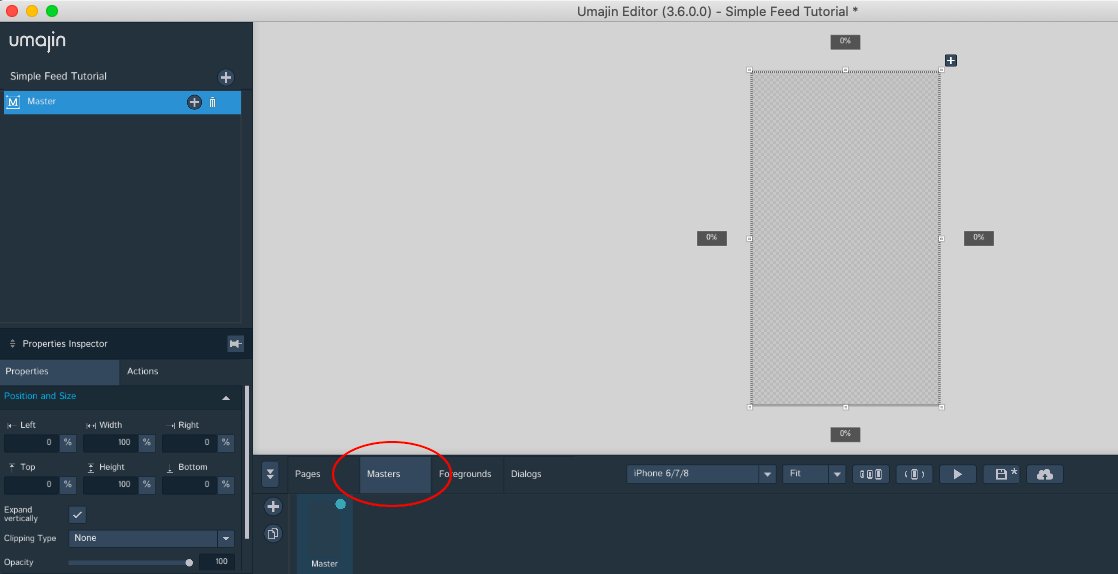
Step 3) Next, click on the Master tab at the bottom of the editor.

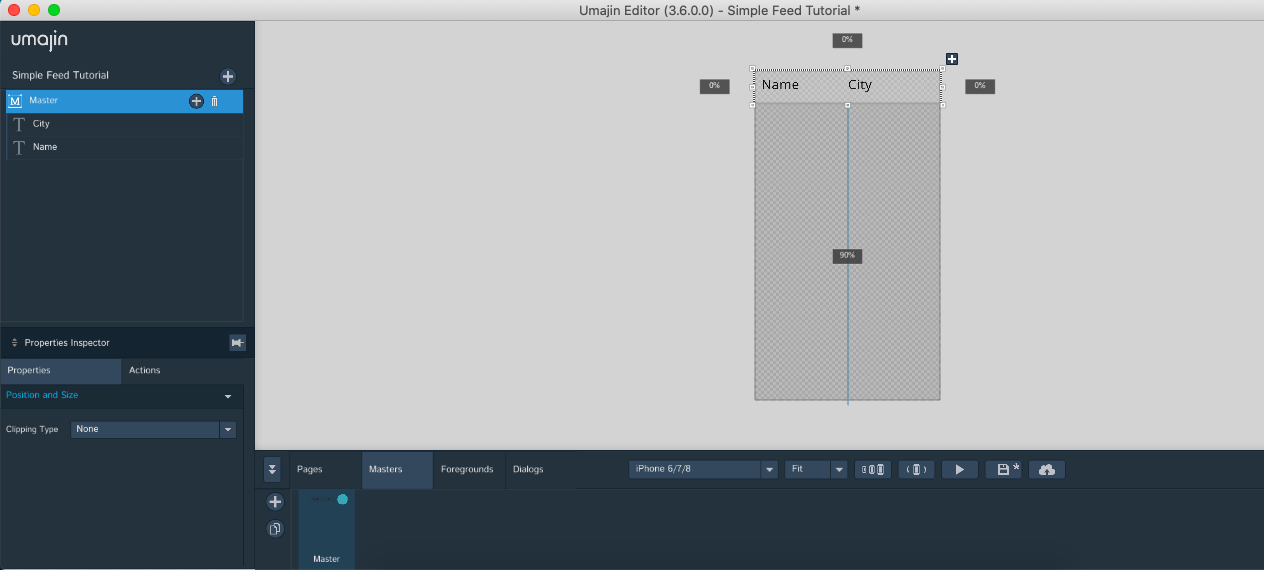
Here, for this example, we will add two Text components from the component selector, and rename them to Name and City. This will act as a base for the feed list on the main page.

Step 4) Once the master has been created, we will now add data for our feed list through cloud services. The cloud services can be opened in two ways.

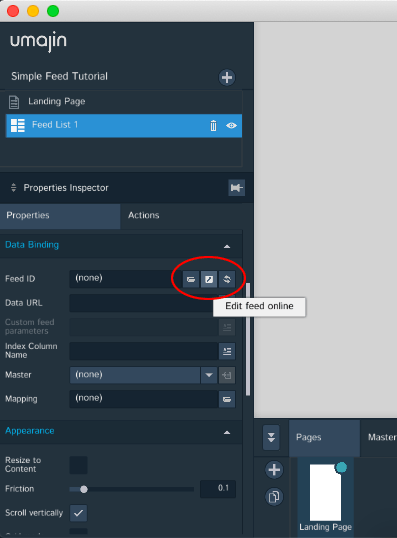
Either go to the Umajin Editor and click on the Feed List component. Here, click on the “Edit Feed Online” button (center) as shown below. This will open up the cloud services webpage to add feed data.

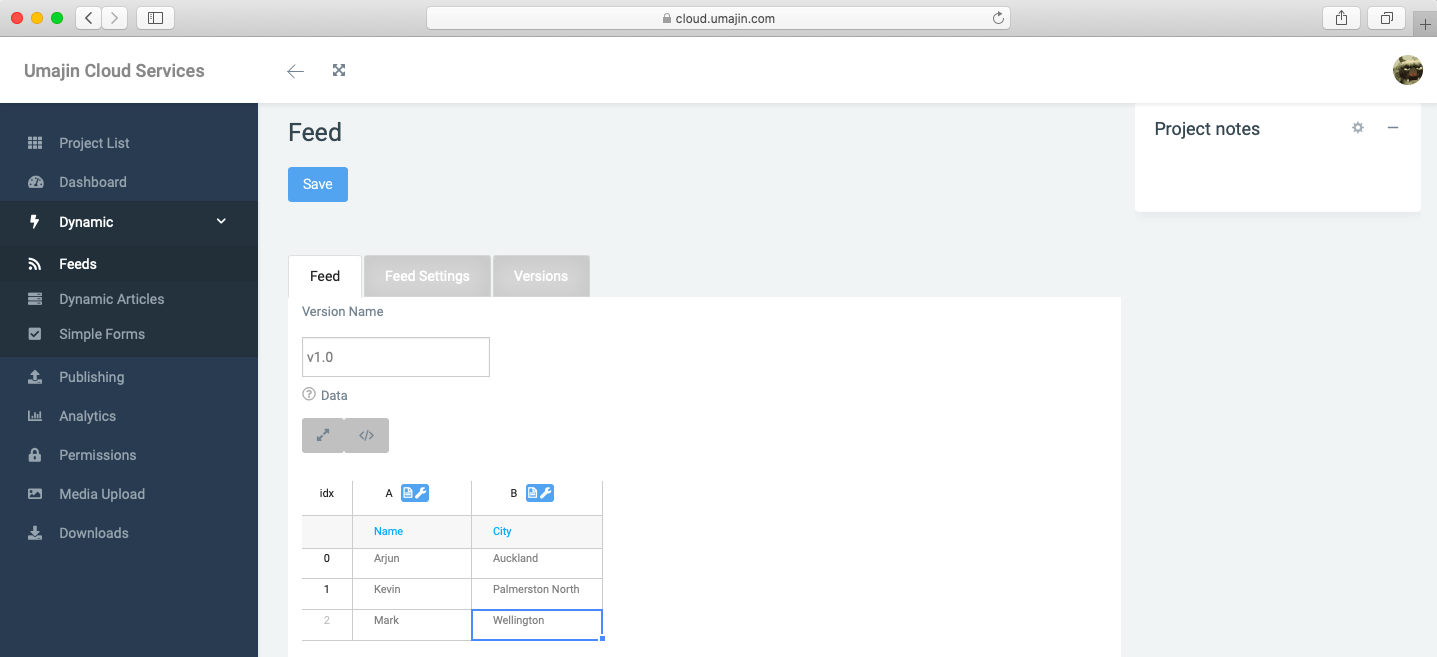
On this page, you will be able to add the feed data that you would like to use in your project. For our example project, we will make 2 columns(City and Name). Try it! It should look something like this:

Or, click on File>Open Cloud Services.

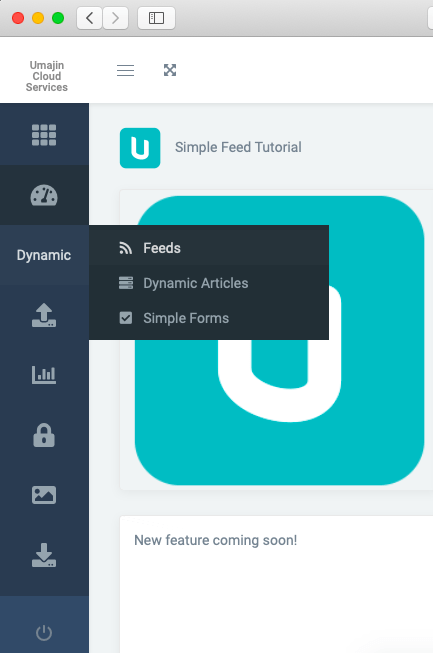
This should open up a webpage to the cloud.umajin.com using your default web browser. Here, go to the option “Dynamic” on the sidebar, and click on the “Feeds” menu.

Once the data has been fed, click on the Save button. The next step is to map the data from the cloud services to the feed list component.

Step 5) Go to the Umajin Editor, and click on the Properties section of the Feed List component on the main page. If step 4 has been correctly done, then you should be able to see the feed data ID and version (see below).

Step 6) Click on the Master option below the Feed ID, and select the master page which you created for this component (see below).

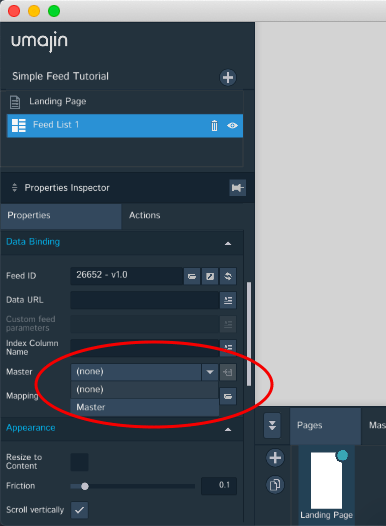
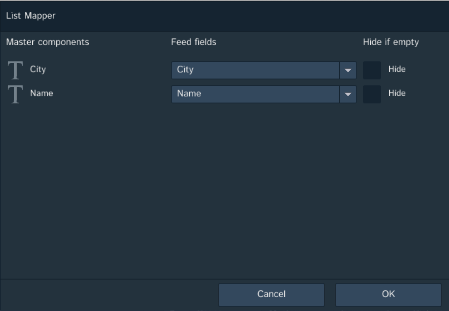
If all the above steps have been followed, it should show “(Mapped)” below the master option you just selected. If it shows “(none)”, then click on it and it should open up a dialogue box (see below). Here you can manually map the feed data to your components.

That’s it.! Now go to your main page and hit the play button. You will be able to scroll through the feed data you added in cloud services. If you wish to edit or add more data, follow step 4 and click the edit option on the feed you require.

  • Umajin
  • Developers
  • Support Home
Menu
  • Umajin
  • Developers
  • Support Home